 REINFORM
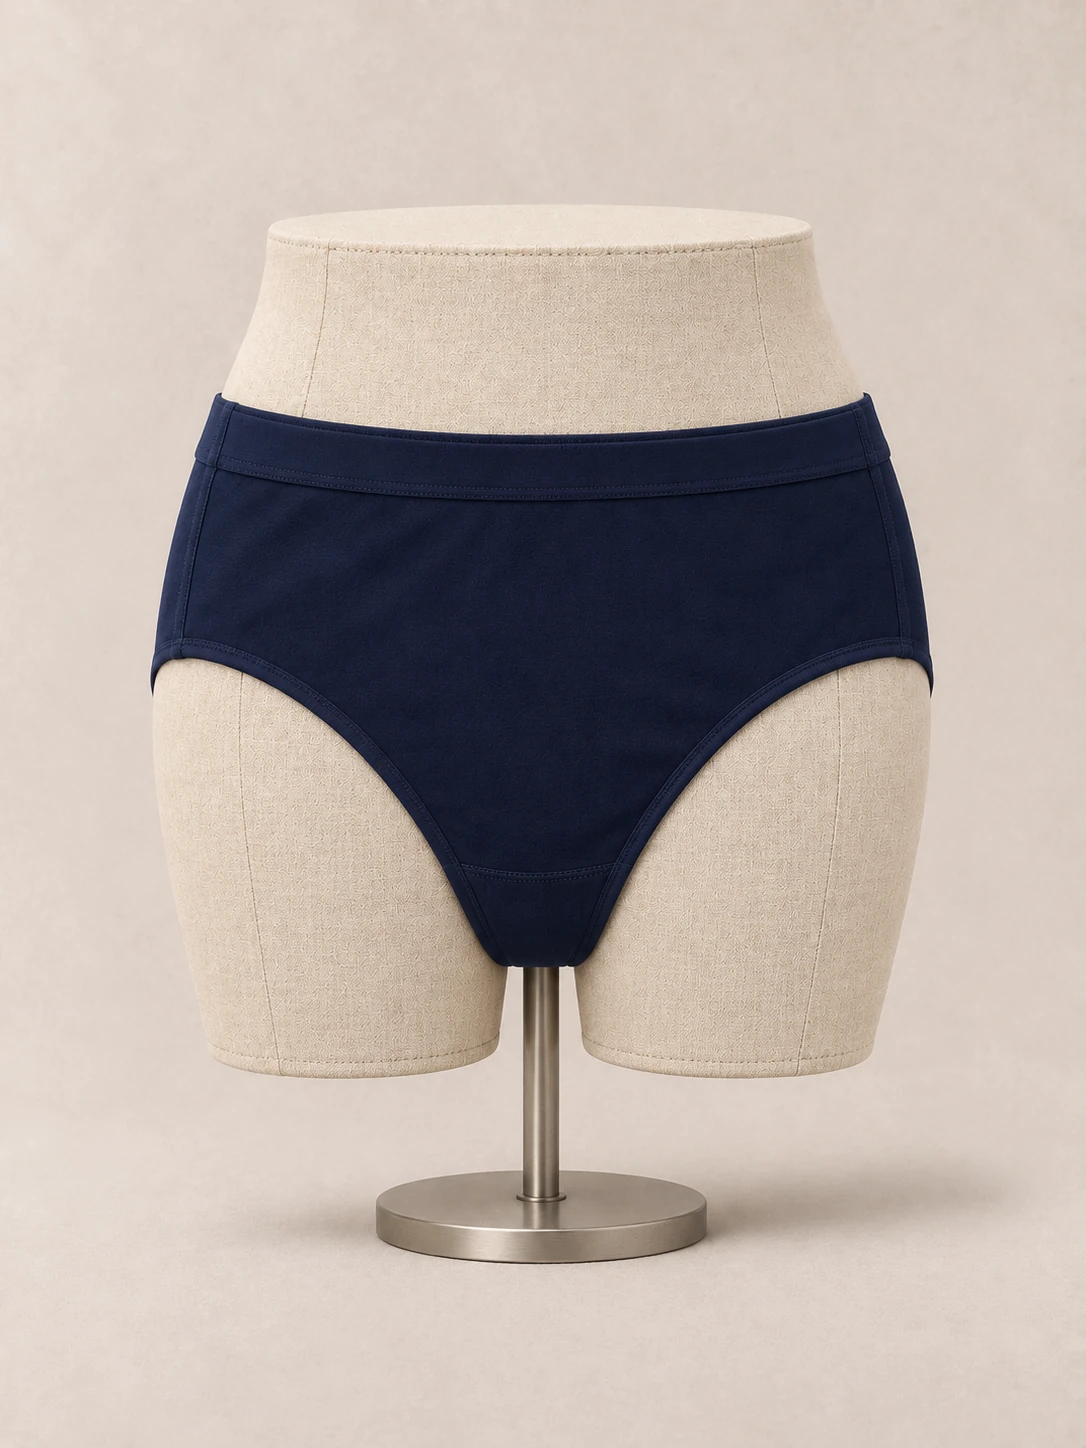
Develop the waist, seat and lined crotch as one brief.
Underwear manufacturer for non-padded rider brief development
Brief an underwear manufacturer for non-padded rider briefs: define the waist, full seat, sewn inner gusset lining and leg edges before sample approval.
PUBLICATION /
CONTENT REVIEW /
A development direction for your brand. Final material, construction and performance by specification and sample approval.START WITH
THE RIDER.
For adult equestrian apparel brands and sourcing teams developing a separate under-breeches brief, with one controlled record of pattern, lining, edge finishes and sample corrections before bulk approval.
Product development context
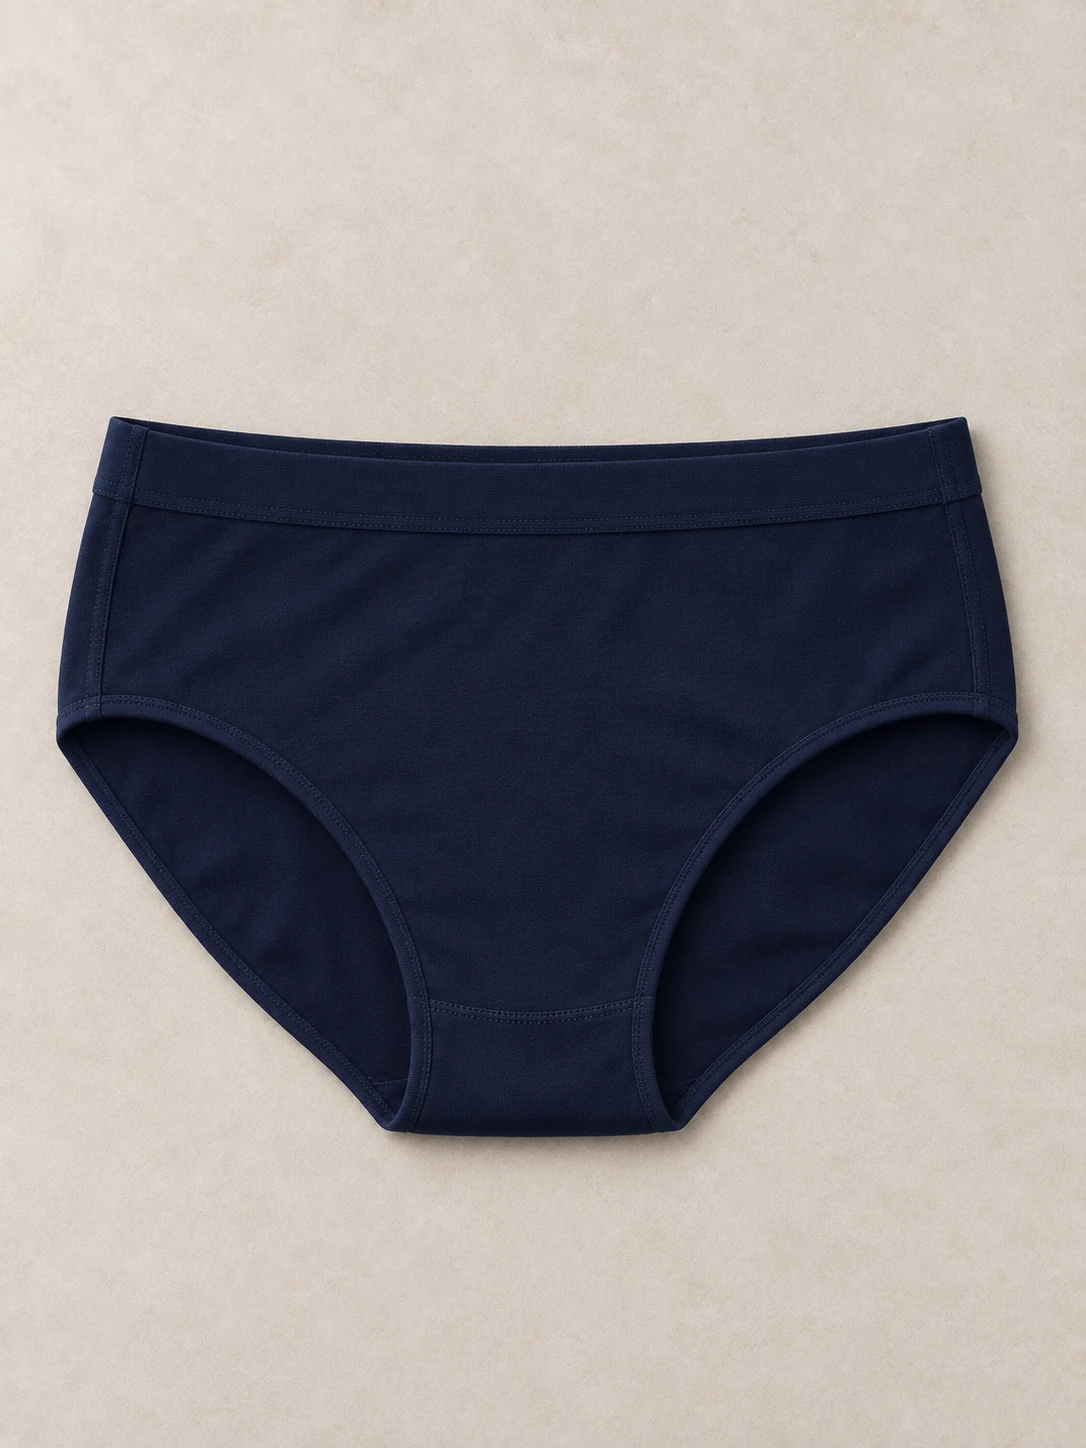
An equestrian brand working with an underwear manufacturer needs more than a front silhouette. REINFORM offers OEM/ODM pattern and sample development for a complete adult non-padded sewn brief: full front and back, a permanently joined crotch with separate inner gusset lining, its own continuous waist entry and two finished leg openings. The proposed navy direction has a mid-rise waist, full seat, low leg line, covered elastic waistband and narrow bound leg edges. Review this independent underlayer beneath the riding breeches named in your brief. The material articles, size chart, elastic specification and physical sample still need project approval. These development illustrations explain the proposed garment; they are not an existing factory sample, stock item or performance result.
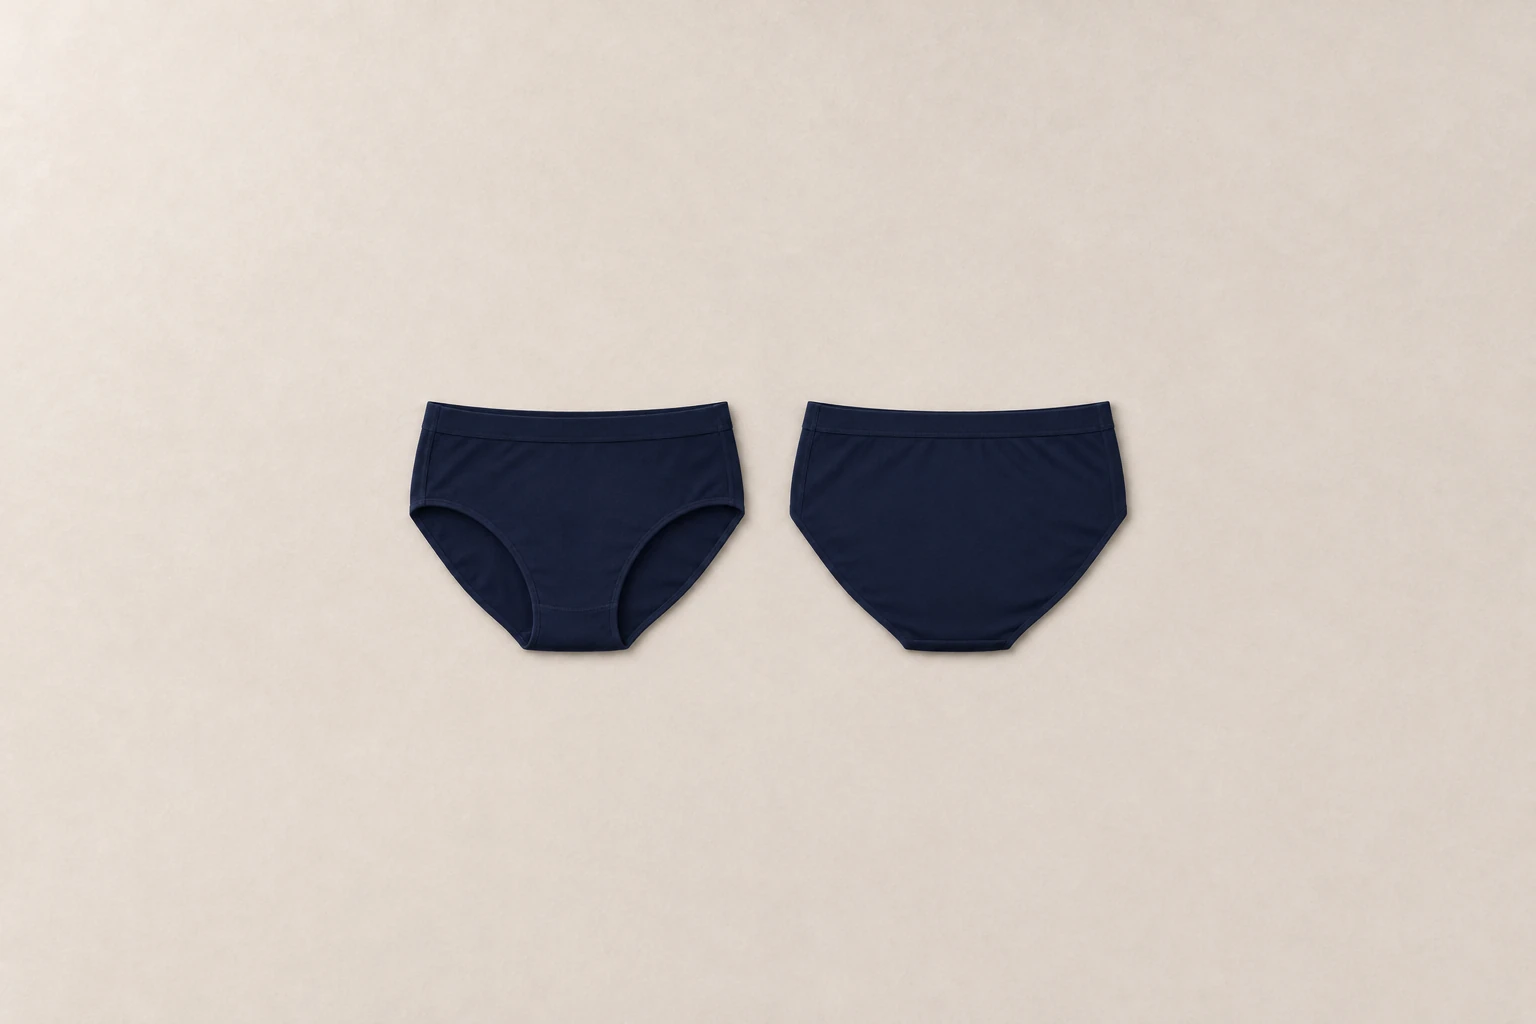
A complete front and full-seat back
Keep front, back and side-join drawings together. Identify the mid-rise waistband position, low leg line and full-seat direction before reviewing the base size. A correction to front rise should remain visible alongside its effect on the crotch fold, back coverage and both leg openings.
Separate lining, permanently sewn in
Mark the inner gusset lining as a separate component, with a front attachment, a rear attachment and defined edges beside the leg binding. It is permanently part of this sewn garment, not a removable pad or opening tab. Inspect the inside of the sample as well as the complete exterior.
Waist and two finished leg openings
The proposed covered waistband and narrow bound leg edges belong to the brief itself. Show their joins, returns and meeting points at the side seams and crotch. Review their position beneath the nominated breeches without assuming a particular elastic width, stretch target or wearing result from the image.
THE FABRIC
SETS THE FEEL.
Compare material directions against your rider, climate and care expectations. Request the actual fabric specification and evidence for any performance claim.
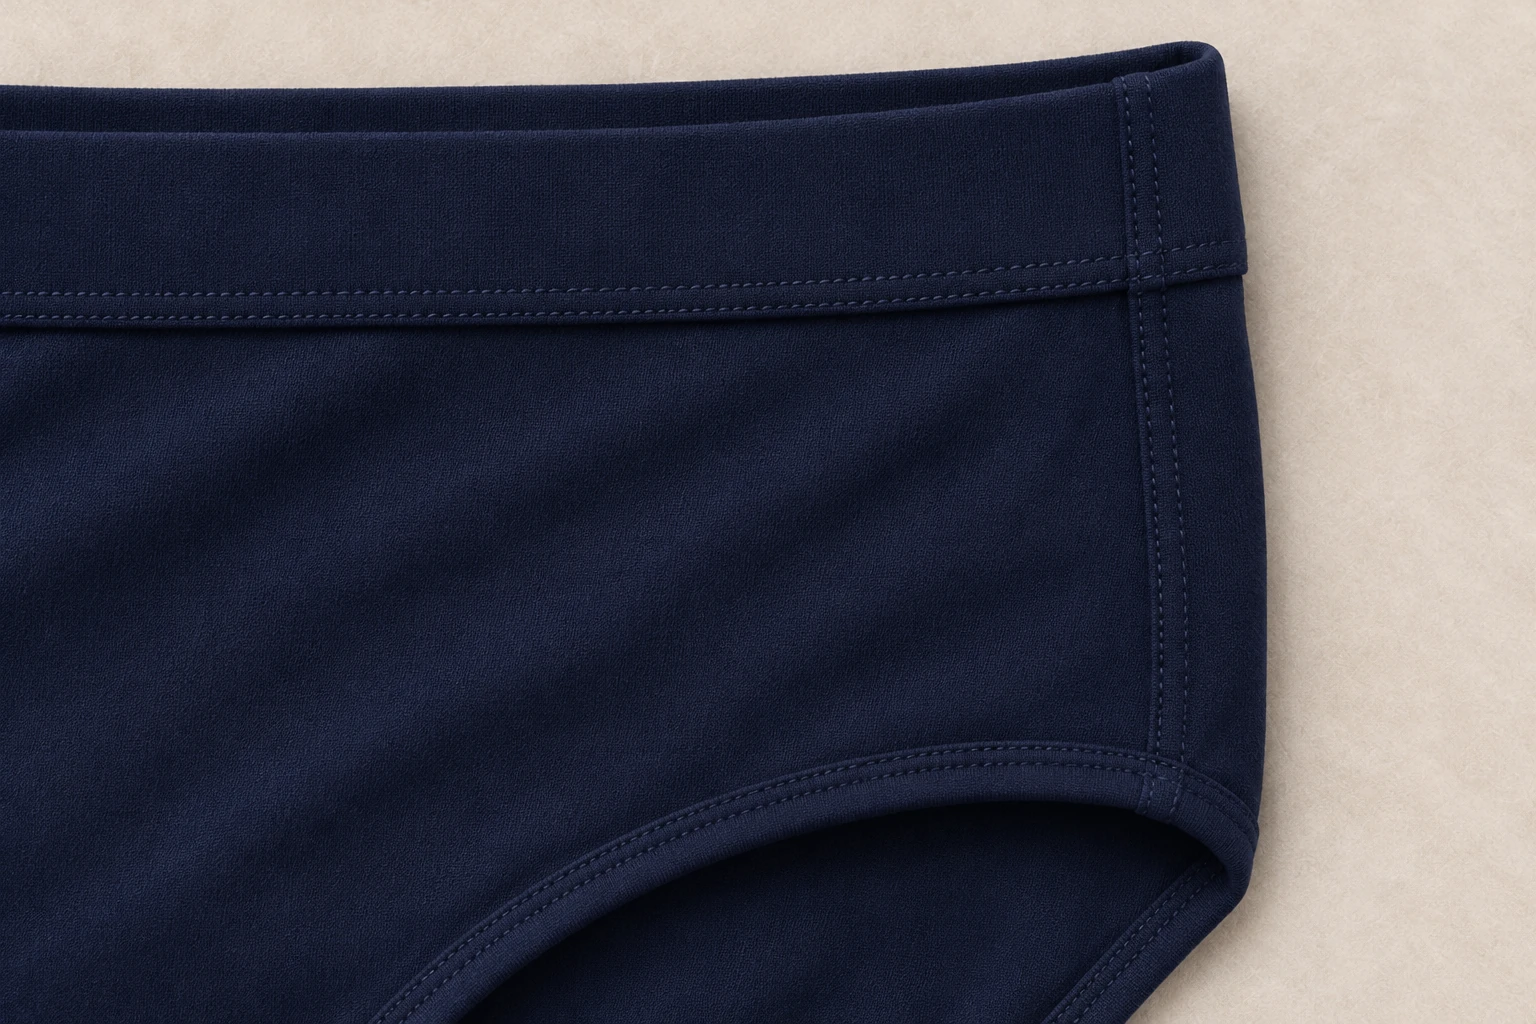
| Material direction | Why consider it | What to verify |
|---|---|---|
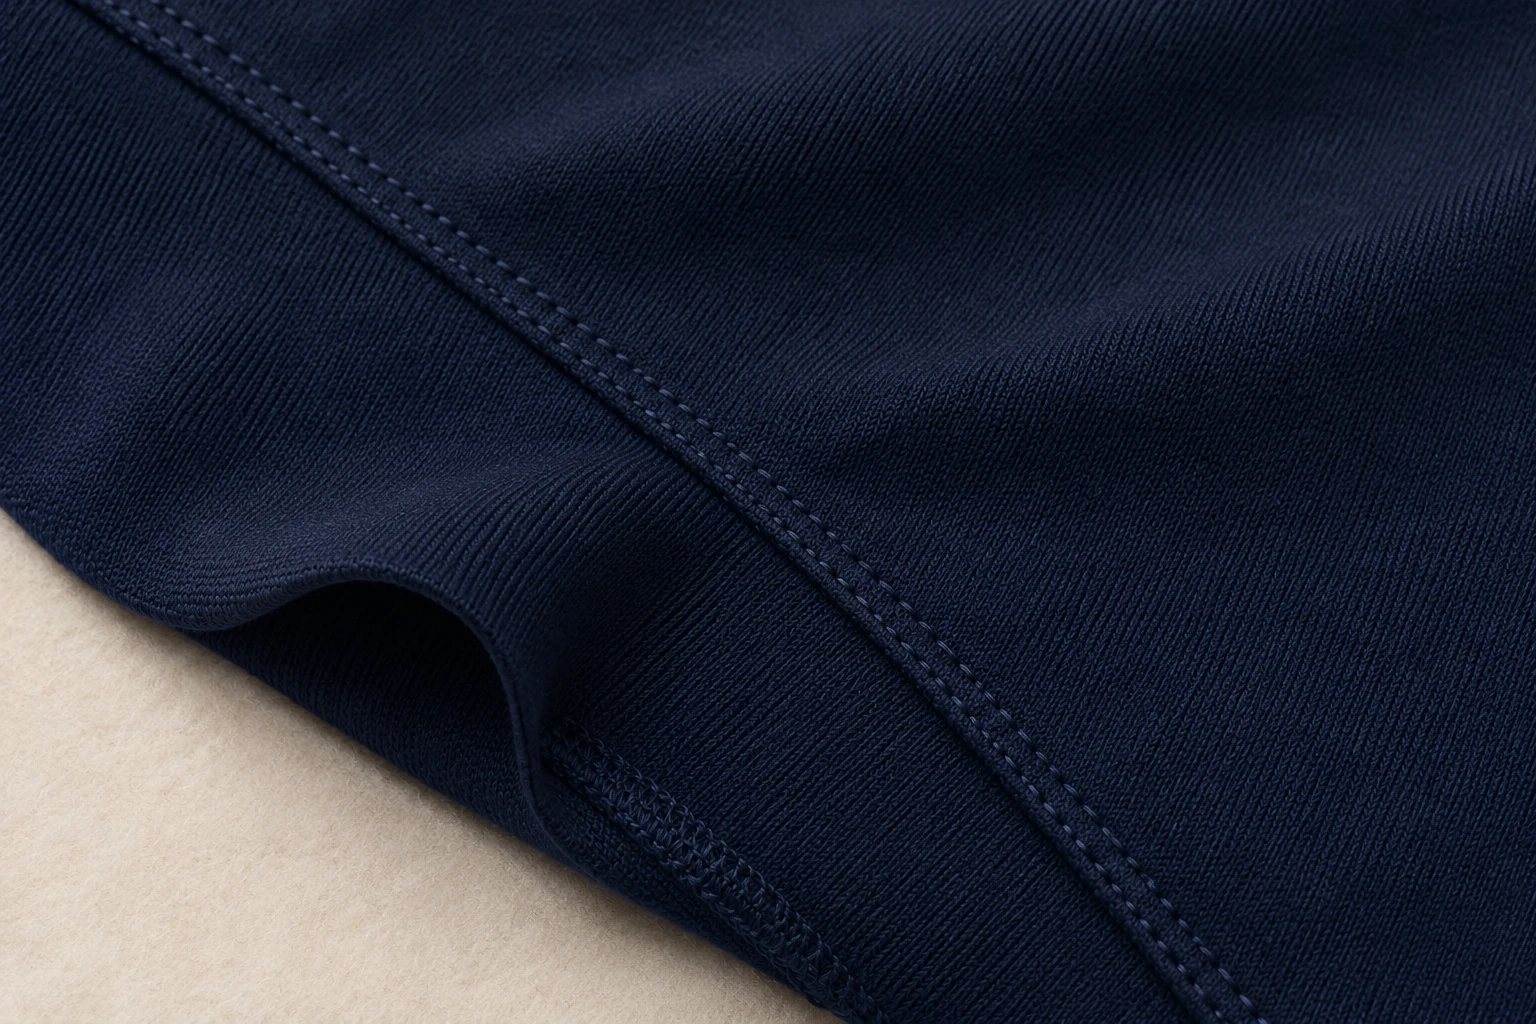
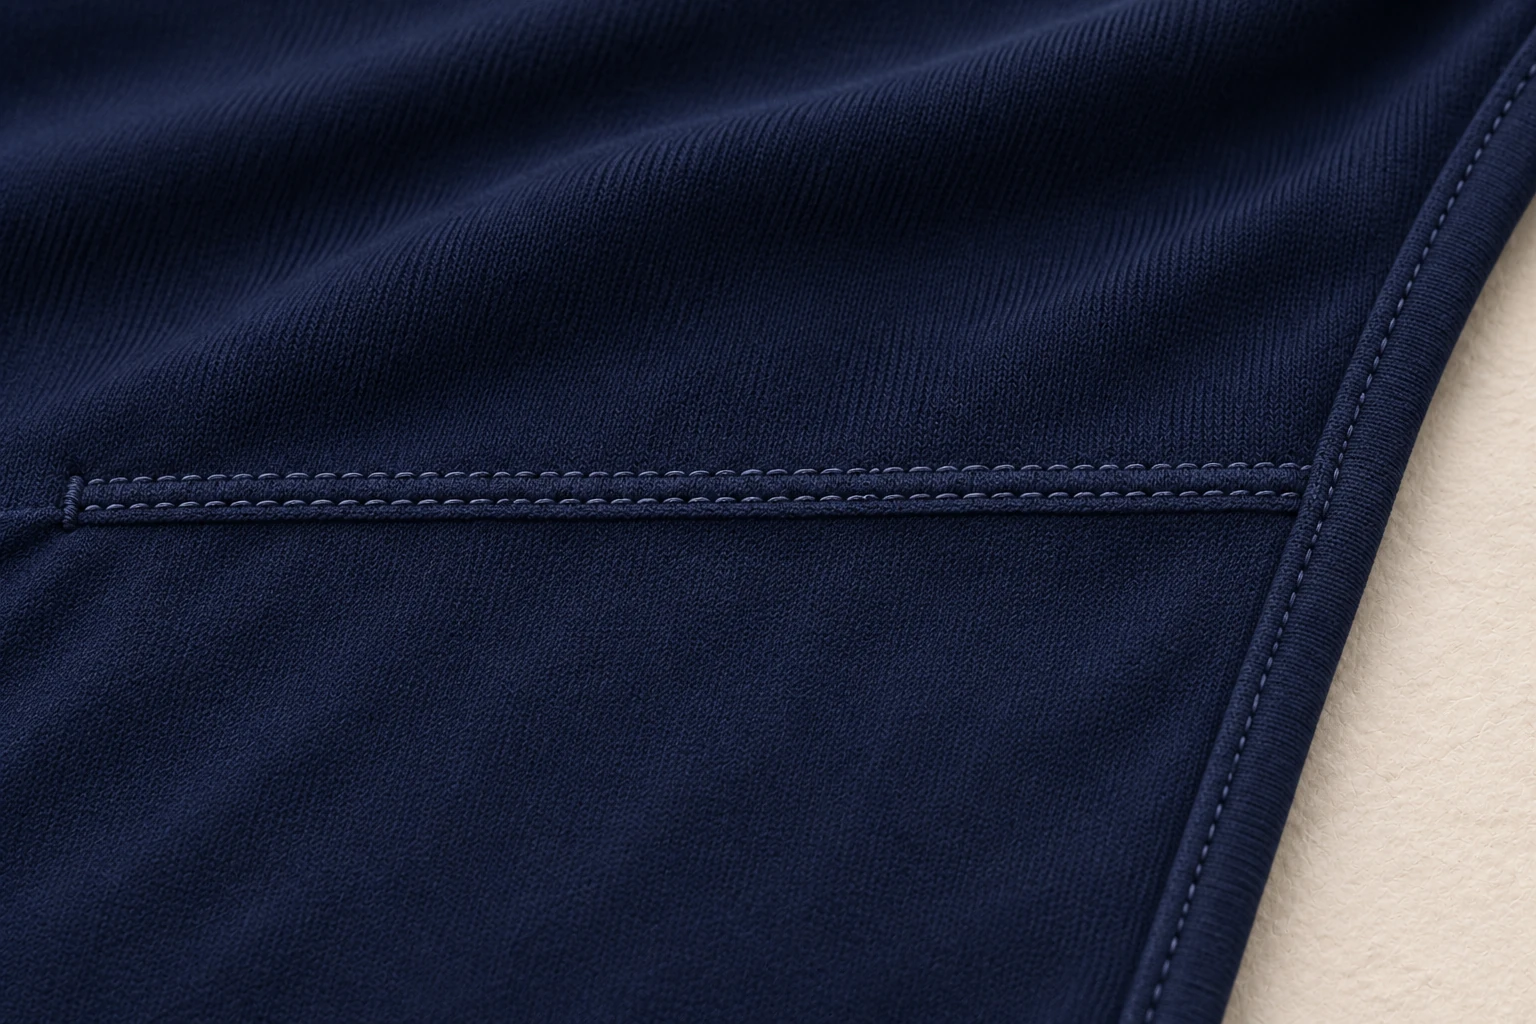
| Matte body knit and side-join trial | A navy opaque knit appearance is the starting design direction for the complete front and full-seat back. The material study shows a sewn side join and a turned edge so the face, reverse and joining layers can be discussed. The illustration does not identify a fibre blend, weight or final material article. | Nominate the body material and retain its reference with the sewn trial. Agree how to review appearance, coverage in the intended fit state, handling and the buyer's care route. Check the actual side join and layer stack rather than transferring a loose swatch decision to the whole brief. |
| Separate inner gusset lining | The proposed inner lining is a separate navy piece sewn permanently inside the crotch. Its shape, orientation and attachment boundaries require their own component reference. Matching colour does not establish that lining and body use the same fabric, and a doubled area is not a padding specification. | Record the lining article, front and rear attachment stitch lines and both edge treatments on an inside drawing. Review the assembled lining against that revision, including any visible folds or displaced seam allowances. Confirm material and care compatibility through the agreed sample-review plan. |
| Covered waist and bound leg edges | The illustrated waistband encloses a separately specified elastic, while the two leg openings use a narrow tonal binding. Their material references, finished widths, joining positions and preparation methods must be agreed separately from the body knit; the image supplies no target tension or elastic grade. | Keep the nominated elastic and binding references beside a sewn waist-to-side-join and leg-edge trial. Agree relaxed measurement and handling conditions, then inspect the finished junctions on the complete sample before and after the specified care state. Record substitutions and recheck the affected edge. |
These are sourcing comparisons, not a list of stocked or certified fabrics. Confirm composition, weight, finish, availability and testing with the material selected for your project.
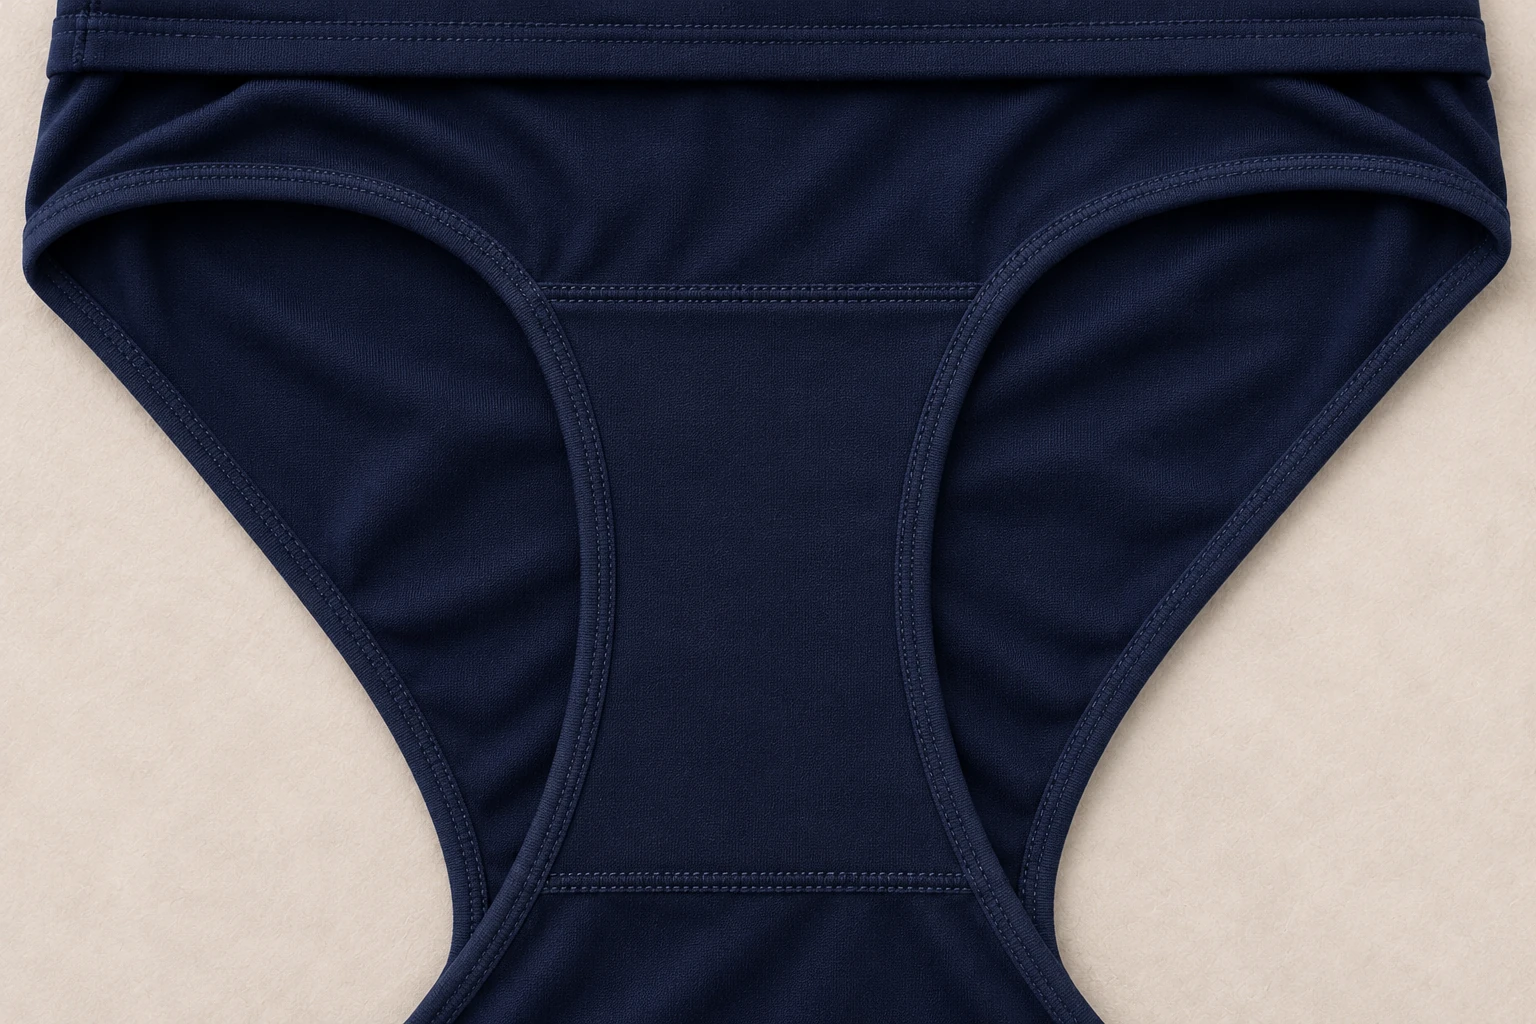 ILLUSTRATIVE INSIDE ASSEMBLY / PERMANENT SEWN LINING
IT’S IN
THE DETAILS.
Front, full-seat back and side joins
Define the full front and back components and the two side joining routes. Keep the back coverage and low leg line identifiable on the drawing rather than relying on the front photograph. Mark seam orientation, allowances and their inside finish for review on the assembled garment.
Closed crotch and independent inner lining
Join the front and back through a permanently sewn crotch, then identify the separate inner lining and its attachment boundaries. There is no snap or detachable opening. Draw the front and rear lining ends and the treatment alongside both leg edges so inside and outside views describe the same assembly.
Continuous covered elastic waistband
Specify how the elastic is enclosed, where its loop is joined and how the covered band connects to the body. Mark the reference point used for relaxed width and any agreed extension review. A continuous waist entry should remain clear without adding a fly, front opening or hardware to this design.
Two bound leg openings and seam junctions
Follow each complete finished opening around the low leg line. Identify where binding meets the side join and permanently sewn crotch, including the reverse and seam ends. Review left and right together; a local correction must not leave the other opening or lining edge undocumented.
FROM THE BRIEF.
INTO THE WORKROOM.
Develop the full front and seat, permanently sewn separate inner lining, covered waist and two bound leg openings as one independent brief. These illustrative component studies identify material and joining questions; they do not establish a final material specification, approved sample or garment performance.
Explore our factory
Front, full-seat back and side joins
Define the full front and back components and the two side joining routes. Keep the back coverage and low leg line identifiable on the drawing rather than relying on the front photograph. Mark seam orientation, allowances and their inside finish for review on the assembled garment.
Carry this into approval Factory views show our working environment. Your garment follows its agreed specification and sample.GET THE
RIGHT FIT.
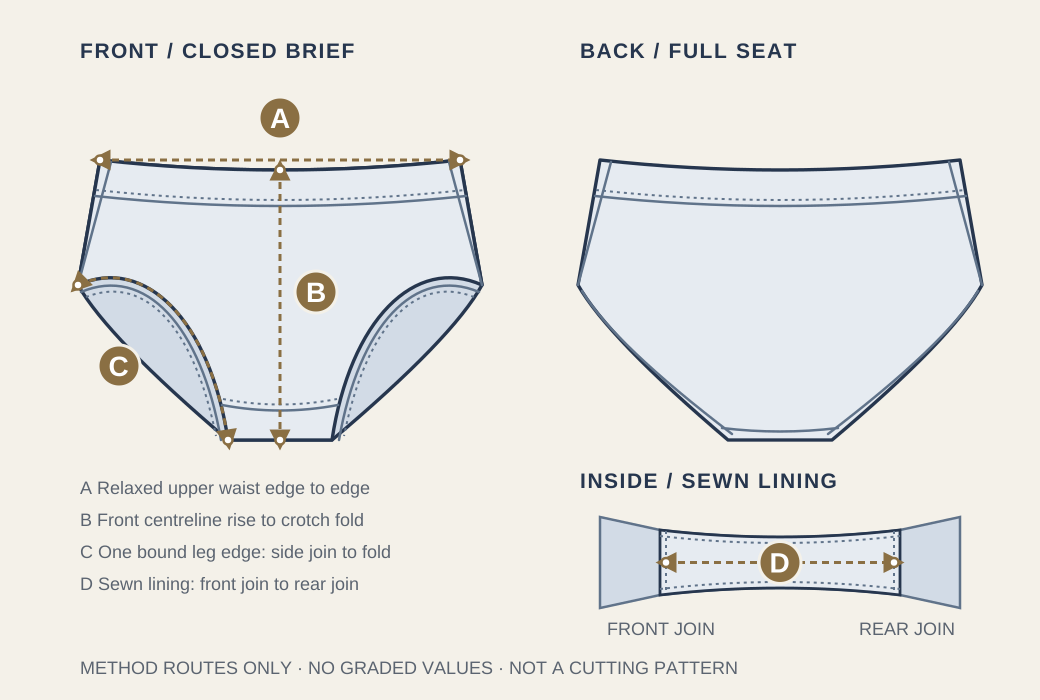
A size label is only the beginning. Agree the measurement method, review the garment in use and keep the approved fit record with your specification.
Your fit-session checklist
Record the size worn, body measurements, intended underlayers and every proposed correction with the dated sample.
Note the size worn, body measurements, intended underlayers and each proposed correction. Recheck the affected measurement after a revision; confirm the size breakdown for each style and colour before bulk.
MAKE IT
RECOGNISABLY YOURS.
Use the product’s construction to guide decoration and finishing. Ask for placement, colour and material approval on the relevant sample.
Small details.
One identity.
Folded edges · fine weave
Textured stock · cord attachment
Raised edge · stitched placement
Material mockups with a live wordmark study. Print, weave, colour matching and placement are confirmed on your physical sample.
Adult size and coverage brief
Supply the adult body-measurement method, waist/hip reference, proposed size chart and sample sizes. Add front/back rise and coverage references rather than borrowing a trouser size label. Agree size progression only after the base sample and the nominated review sizes have been assessed.
Waist, leg and lining specifications
The proposed garment uses covered waist elastic, bound legs and a separate permanent lining. Identify each component in the BOM, with the agreed finish and placement. A change to elastic, binding or lining needs an explicit revision and review of the connected seam junctions.
Colour and brand placement
Navy is the illustration direction. Supply the colour standard, proposed artwork and placement dimensions for the actual knit. Review the application on the selected material, keeping its relationship to the waistband, leg edges, side joins and lining attachment visible in the approval record.
Labels, care information and packing
Agree label position and attachment while reviewing the inside of the brief. Confirm materials and intended care before finalising destination-specific information for US, UK or European orders. State packing and identification requirements in the order brief; one destination's wording does not automatically cover another.
APPROVE THE DETAIL.
THEN THE ORDER.
The first sample helps you make decisions. Define review conditions and acceptance criteria before you compare the result.
Review the non-padded rider briefs sample
Sampling takes 7–10 working days from the agreed start. Record each decision against the dated sample before bulk approval.
Rider, material direction, measurements and artwork.
DEFINE THE STARTTurn the agreed direction into a garment to review.
7–10 WORKING DAYSReview fit, finish and changes. Confirm the final specification.
REVISE IF NEEDEDProceed with agreed quantities, colours, labels and packing.
30–45 WORKING DAYSA shared development direction
Bring reference garments, your rider profile, target colours and any artwork. We turn these into the measurements, materials and construction questions that the sample needs to resolve.
Sample feedback can return to development. Revisions and transit are planned separately; timing begins from the agreed specification and start date.

KEEP THE APPROVAL.
WITH THE ORDER.
One agreed reference for the workroom: the dated sample, its specification and your confirmed order breakdown.
Sample decisions
- Whole-garment and component identity
Compare front, back and inside views with the dated drawings. Confirm the full-seat brief, its own waist entry, two finished leg openings and separate permanent lining. Record any missing join, changed leg line or undefined inside edge against that exact sample revision.
- Standing and seated layer review
Record the adult fit wearer, body references, sample size and nominated outer breeches. Review waist relationship, front/back coverage, leg-edge position and lining placement standing, seated and during agreed forward reach. Log observations as development feedback without turning the session into a performance claim.
- Permanent lining and local seam finish
Inspect both lining attachment ends and the edges alongside the bound openings. Check the inside seam allowances, loose ends, displaced layers and any folds against the approved assembly drawing. Record the affected location and proposed correction rather than approving only the exterior view.
Style, colour & size allocation
Confirm each style and colour separately, with the size allocation attached. The minimum is 300 pieces per style, per colour.
Labels, packing & timing
Agree label artwork, packing instructions and the production start. Bulk production takes 30–45 working days from the confirmed start; revisions and transit are planned separately.
A CLEARER BRIEF.
A MORE USEFUL QUOTE.
Price follows an agreed product, quantity and delivery scope. Use these inputs to compare proposals on the same basis.
Body and lining component preparation
The front, back and separate inner lining need a controlled component map and joining scope. Compare quotations against the same drawing and material articles so the lined assembly is included rather than treated as an unspecified addition.
Waist and leg-edge assembly
Elastic enclosure, loop joining, binding preparation and the side/crotch junctions contribute to the quoted construction. Nominate the finish and component references; changing them after sampling can require another assembly review.
Size range and sample revisions
State the base size, review sizes, planned range and included revision rounds. Adjustments to rise, seat, lining or leg line need coordinated pattern records, with the development work and approval stages visible in the offer.
Evidence, decoration and order finish
Buyer-requested evidence, colour work, artwork, labels, packing and delivery terms affect the quotation scope. Use the same style revision and size allocation when comparing fabric-use assumptions, inclusions and open items between suppliers.
Bring these six things
Planning baseline: 300 pieces minimum per style, per colour. Sampling takes 7–10 working days; bulk production takes 30–45 working days from the agreed start.
300 pieces minimum per style, per colour. State each colour quantity separately; confirm your proposed size allocation.
GOOD QUESTIONS.
BETTER DECISIONS.
Product-specific sourcing questions to resolve before sampling.
Can REINFORM develop the complete non-padded brief?
We offer OEM/ODM pattern and sample development for the adult sewn brief described here: full front/back, a permanently joined crotch with separate inner lining, its own continuous waist entry and two finished leg openings. Begin with your size and construction brief, then review the complete physical sample before approving production.
Is this a padded garment or a snap-crotch bodysuit?
The proposed brief has no padding, upper-body connection or crotch snaps. Its separate inner gusset lining is permanently sewn in. The design is developed as an independent under-breeches garment; lining, edge and fit review do not establish protection, shaping, anti-friction or seamless performance.
What should an underwear manufacturer quote for this style?
Request the same full front/back/lining drawings, material and edge-finish brief, size allocation and sample-review scope from each supplier. Compare included pattern development, sewn components, revisions and requested evidence as well as unit-price scope. Confirm the actual sample and final specification before authorising bulk.